

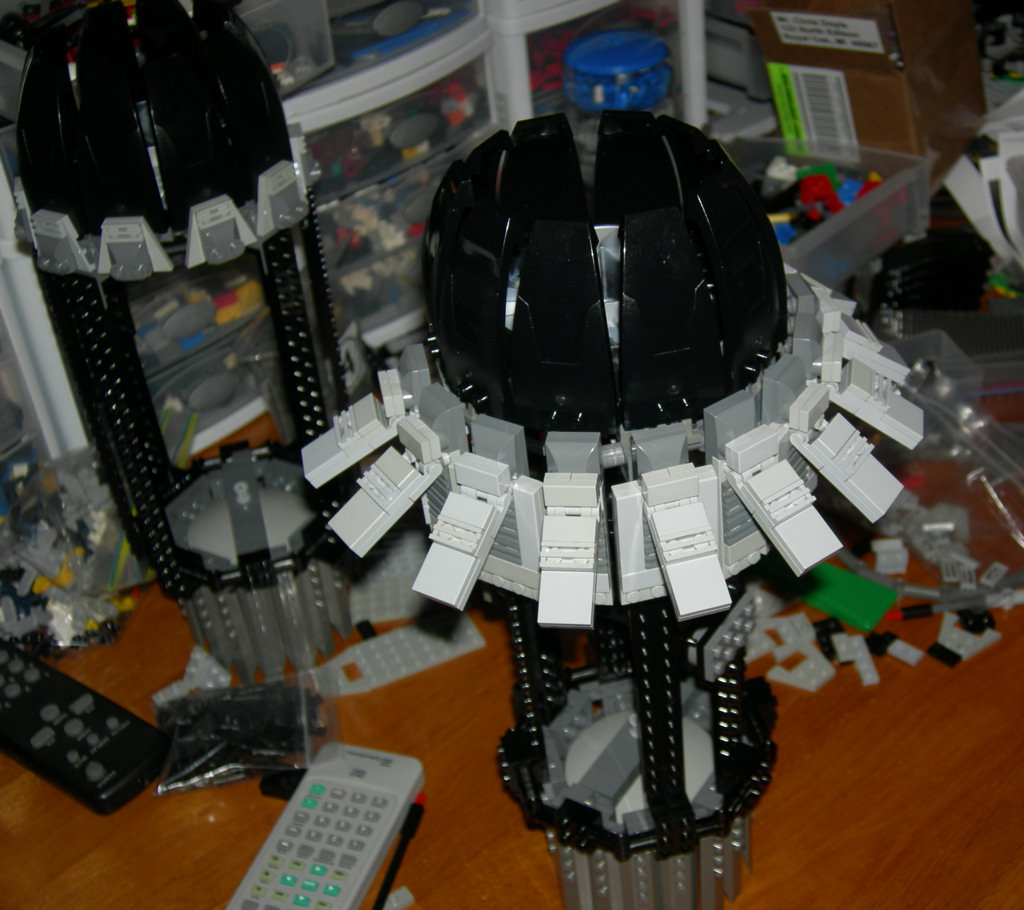
 Another small update, but one that demonstrates why I have to be in the right frame of mind to work on this project.
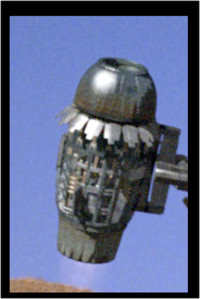
I was reviewing my archive of source photos and thinking about those flaps at the front of the side engines and my recent attempt to duplicate them.
As you can see in these two photos, I'm not too far off...
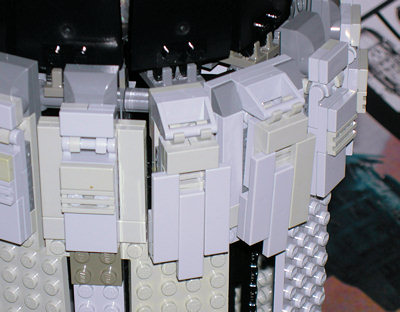
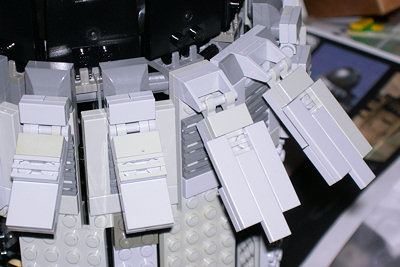
The final of about six tries at various shapes and methods - the two flaps on the left are original, the two on the right are the upgrades. (I had no idea how much grey and blue-grey I had mixed until I adjusted the contrast on these photos. Yikes!) The shape of the flaps is much more accurate - and the new join-line helps fill in the gap between the cowling and the rest of the "skin".
The biggest challenge was finding a way to go from 2 to 3 studs in width without going more than two plates in thickness. Once I had that figured out, the rest of the design came together pretty quickly.
Next step is to replicate the new design for both copies of the engine - then get to work on that connecting bracket.


4 comments:
I have so gotta buildthis behemoth of a model!
I like the new tips, but i prefer the old conecters better
zack:
I like the old connectors, too, but they aren't as accurate to the actual ship design. :-\
One of these days I'll get around to building my own idea for a tramp freighter...
I'm glad we're seeing the building!
Most Lego Artists just show you a finished product. I'm liking how this is coming along =Þ
Post a Comment